Patriotic Flag Cake~
Two Red Cakes
One white cake
One blue cake
Frosting
*note~ I used the recipe below for my white and blue cake. It was delicious and it held up well to being cut!
http://www.kingarthurflour.com/recipes/tender-white-cake-recipe
1) Cut cooled cakes into the following shapes below. One red cake was cut in half and then set aside. The other red cake was cut in half and I took a small round bowl, set it on top of the half and cut out the small circle. All extra scraps and half of cake I put aside to make cake balls for a later date.
2) For the white cake, I cut it in half. I kept one half and with the other half, took the same small bowl, set it on top for my template and cut out a small circle. Again, extra pieces were set aside for later use for cake balls.
3) For the blue cake, I cut just the top off to even it ( you'll need the whole cake for this part) and used the small bowl for a template and cut out the middle. (Middle piece saved for later use.)
Now to begin~
4) I started with half of the red cake and placed it on my serving platter and lightly frosted the top.
5) I placed the white on top, frosted it and then the red on top of that and frosted it. Easy enough so far.
6) I placed the blue round on top next.
7) In the center, gently place the white round inside. I frosted the white round.
8) Now, in the center, I placed the red round in and I gently pressed on it to make sure it was even with the blue layer.
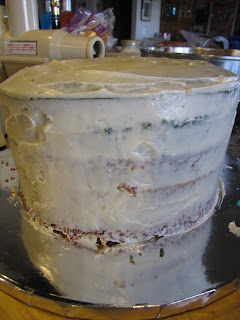
9) Lightly frosted the whole cake.
10) To frost my cake, I decided to do an ombre (layered blending color look) style using a star tip. In a separate bowl, I added blue coloring to about a cup of frosting and mixed well.
11) I frosted the first layer of the bottom of the cake making little rosettes by making a circle and a half motions.
12) For the next layer of rosettes, I emptied the remainder of the frosting from my frosting bag into the bowl with blue frosting, added about 1/2 cup of white frosting and mixed well. Now I have a lighter shade of blue to frost the middle layer.
13) I repeated the next step for the next and last layer of blue by adding more white frosting.
14) For the very top layer, I used white only making rosettes on the outside top, moving in to fill in the center. Then I added a pretty marzipan flag that I made just for the occasion. Find the recipe and how to for the Marzipan flag here... http://celebratemywhimsy.blogspot.com/2013/07/homemade-marzipan.html
And Voila... Here's a pretty cake for the holiday. And now for the best part....
WE EAT!!!
What was fun about this part, the party guests were amazed not only by the cake, but the fun whimsy inside!
Happy Memorial Day, Happy 4th of July, Happy Labor Day...Happy Everything!
Blessings and Happy Baking~
Kimberly
Here is a recent photo of a Military style Patriotic cake I made for my son's Grad Party, camo style!
My guests had no idea of the fun inside until the first cut!


No comments:
Post a Comment
Note: Only a member of this blog may post a comment.